003 Authentication and Validation of Email and Domain Name
- 0 — Intro and resources
- 1 — Options for enabling TLS
- 2 — Private key and certificate request
- 3 — Authentication and Validation
- 4 — Processing the Certificate Request
- 5 — Apache configuration
- 6 — On trusted Authorities
To carry on with the following steps you can forget about the previously created certificate requets because they will be used later. Now you need to sign in for an account at the StartCom Certification Authority. There is some aspects that is best to be informed about before signing into their website.
StartSSL will not authenticate yourself in the normal way in which you would have a user password that you could use from any computer to sign into your account. Instead, StartSSL will create a key that will be stored in your browser once you have accepted the operation. From now on, each time you access the StartSSL website, you will be asked to allow StartSSL to access the document. This means that you must access your profile at StartSSL from the same computer and browser that you used to register the first time. Since StartSSL free certificates are extended for just one year of duration, it is very important that you burn this personal key to an external CD and keep it safely and outside your computer. This will prevent future problems whenever you need to update certificates, etc… That way you will always have the posssibility of installing your personal key in other browsers that will allow you to access the information associated to your certificates in the future.
Next you have to validate your personal email. To complete this step you can navigate to the StartSSL main page and click on the button that looks like the one below, which allowes you to “Log into your control panel”.

From the control panel you first have to click on the Validation tab, and select from the dropdown menu the email validation option. Next follow steps in order to validate your email account.
Domain Name validation
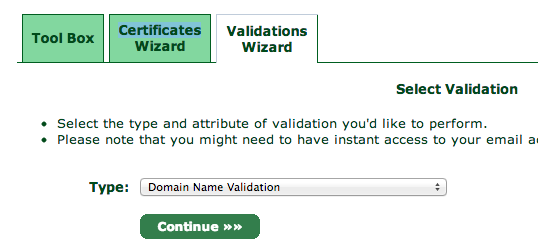
At this point we will proceed with the Domain Name validation, that as explained before will prove yourself as the owner of the Domain Name for which you want to request a certificate. Navigate to the StartSSL main page and again click the button that will allow you to enter the control panel. Inside the control panel you must click again on the Validation tab, but unlike the previous step, now we must choose from the dropdown menu the option that corresponds to the Domain Name Validation.
Then you will enter the Domain Name for which you want to prove ownership. It is not needed that you enter here a FQDN, so enter just the Domain Name as it was registered (e.g, mydomain.com). At this point the StartSSL engine should have performed a whois query on your domain, so the working email account that you have configured with your DNS provider to be included within your whois contact info should be included as an option. Select it, and go to your email account to retrieve the needed verification code, that StartSSL has sent to you. Checkout the spam mailbox, in case you do not find it or click on the send new verification code button at the StartCom panel.
Once you have made yourself with the verification code sent to the email account associated to the Domain, go back to StartSSL and paste it inside the text field that has been enabled for that purpose. StartSSL should respond with the corresponding feedback that will let you know wether you have successfully validated the Domain Name or not.